在网页布局中,CSS定位是实现元素精准控制的关键技术之一。通过position属性,我们可以将元素放置在页面的任何位置,并控制其相对于其他元素的行为。本文将深入解析position属性的各个取值及其应用场景,帮助你掌握CSS定位的精髓。
1. position属性概述
position属性用于指定元素的定位方式,它有以下几个取值:
-
static:默认值,元素按照正常的文档流进行布局。
-
relative:相对定位,元素相对于其正常位置进行偏移。
-
absolute:绝对定位,元素相对于最近的已定位祖先元素进行定位。
-
fixed:固定定位,元素相对于浏览器窗口进行定位。
-
sticky:粘性定位,元素在滚动时根据设定的阈值在相对定位和固定定位之间切换。
2.相对定位relative
特点:
- 不会释放文档流;(不改变宽占位)
- 基于自身左上角的点进行定位;
- 上下左右为平移距离;
例如:
css部分:
css">.div1{
      width: 200px;
      height: 200px;
      background-color: red;
    }
    .div2{
      width: 200px;
      height: 200px;
      background-color: blue;
    }
html部分:
<div class="div1"></div>
<div class="div2"></div>
运行结果:
css"> .div1{
width: 200px;
height: 200px;
background-color: red;
}
.div2{
width: 200px;
height: 200px;
background-color: blue;
/* 相对定位 */
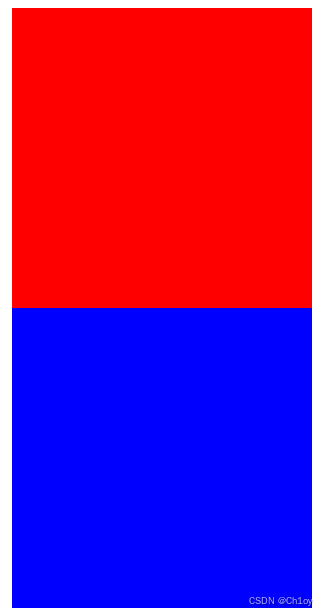
position: relative;
left: 50px;
}在div2的css中设置相对定位,并且设置距离左边50px,如下图所示:
应用场景:
-
微调元素位置,使其与周围元素对齐。
-
作为绝对定位元素的参考点。
3.绝定定位absolute
特点:
- 会释放文档流;
- 判断父视图是否带有定位属性,如果有,则相对于其父视图左上角的原点进行定位;如果没有,就找父视图的父,以此类推,直到找到再根据其左上角的原点进行定位;(若都无父视图,那就把body当作父视图,根据网页的左上角为原点进行定位)
- 上下左右为与父视图的距离;
例如:
<style>
.div1{
width: 200px;
height: 200px;
background-color: red;
}
.div2{
width: 200px;
height: 200px;
background-color: yellow;
}
.div3{
width: 200px;
height: 200px;
background-color: green;
}
</style>
</style>
</head>
<body>
<div class="div1"></div>
<div class="div2"></div>
<div class="div3"></div>
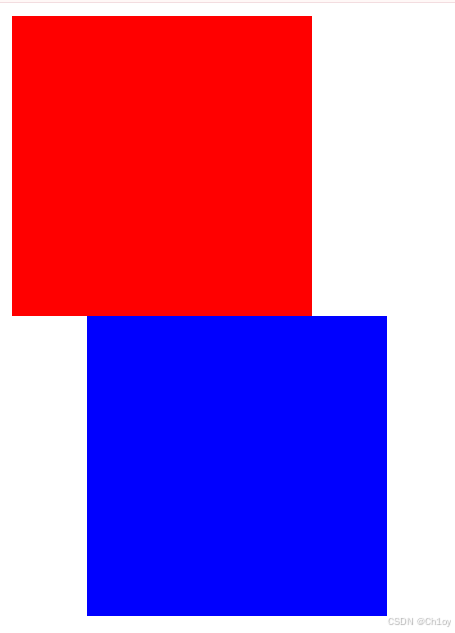
</body>运行结果:
现在对div2加入绝对定位,并且距离左边100px,距离上面100px。
css">.div2{
      width: 200px;
      height: 200px;
      background-color: yellow;
      /* 绝对定位 */
      position: absolute;
      left: 100px;
      top:100px;
    }
运行结果为:
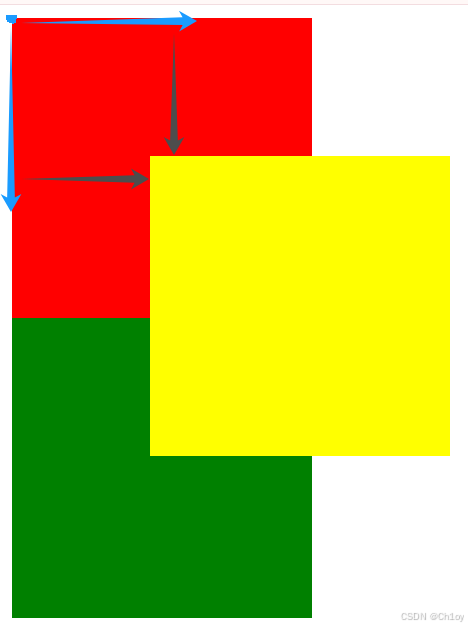
应用场景:
-
创建浮动元素,如提示框、下拉菜单等。
-
实现复杂的布局效果,如重叠元素、层叠卡片等。
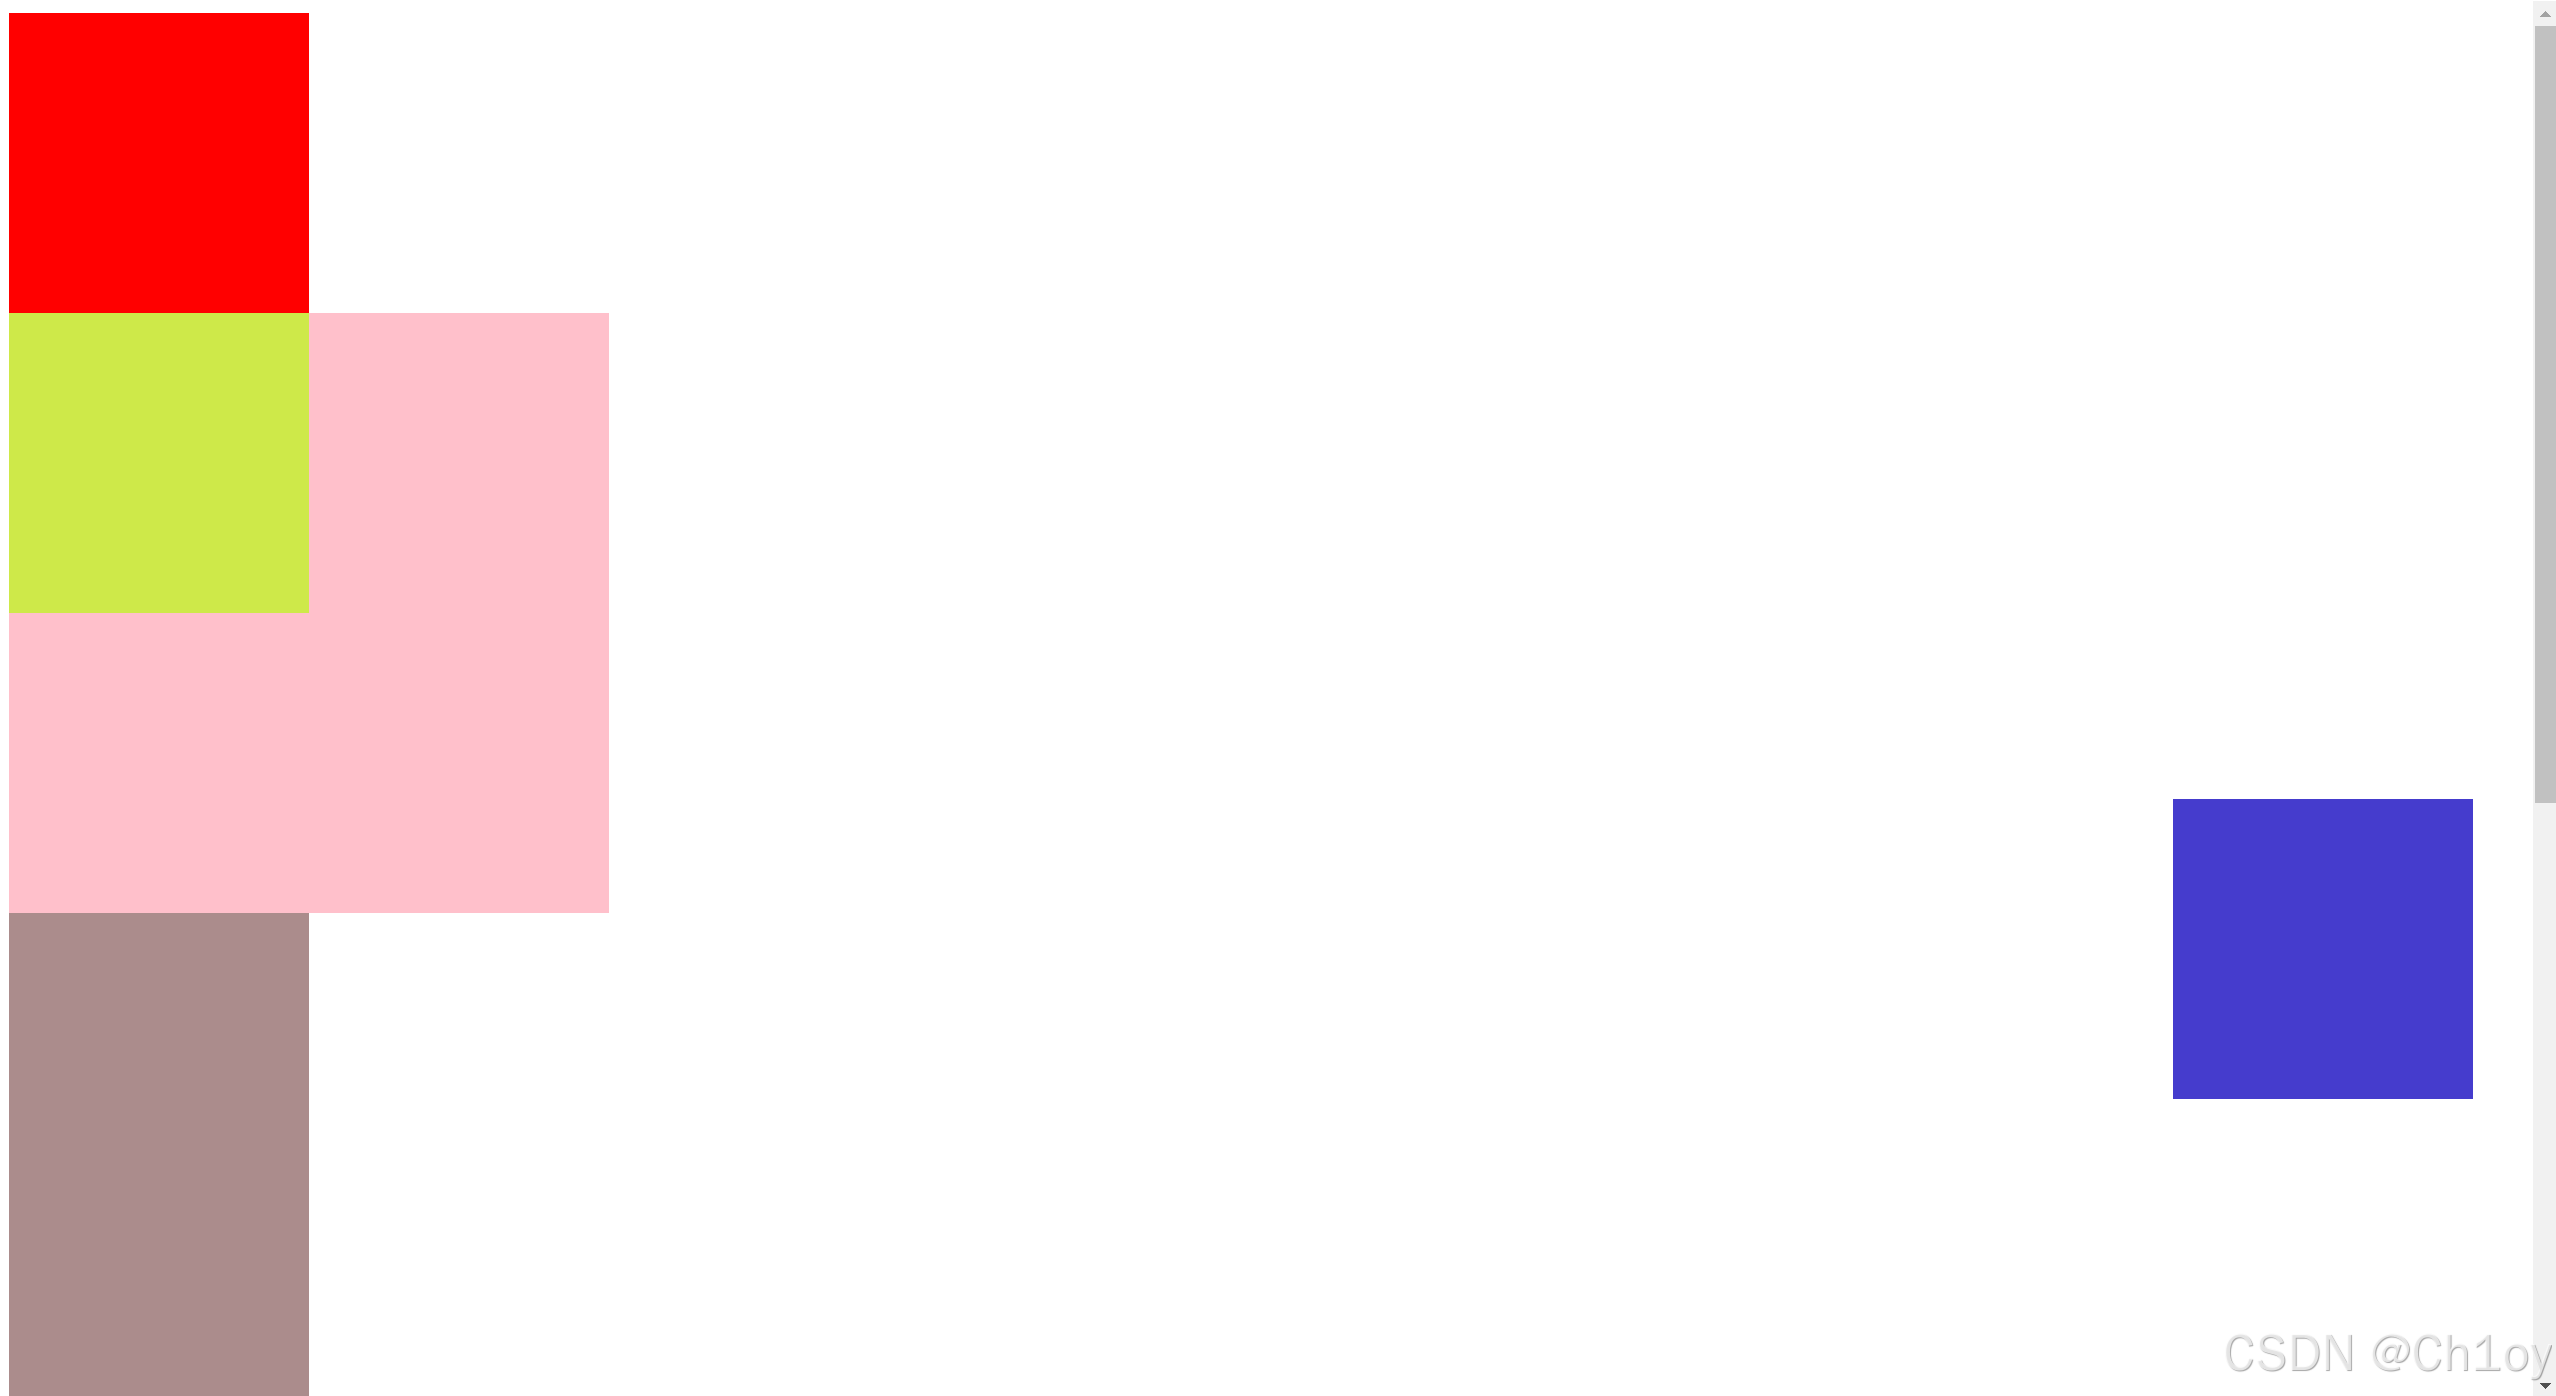
4.固定定位fixed
特点:
- 释放文档流;
- 基于屏幕固定定位
- 上下左右为与屏幕四边的距离
例如:
<!DOCTYPE html>
<html lang="en">
<head>
  <meta charset="UTF-8">
  <meta name="viewport" content="width=device-width, initial-scale=1.0">
  <title>Document</title>
  <style>
    .div01 {
      height: 200px;
      width: 200px;
      background-color: red;
    }

    .div02 {
      height: 200px;
      width: 200px;
      background-color: rgb(206, 233, 73);
    }

    .div22{
      height: 400px;
      width: 400px;
      background-color: pink;
    }

    .div03 {
      height: 200px;
      width: 200px;
      background-color: rgb(69, 60, 205);
      position: fixed;
      bottom: 200px;
      right: 40px;
    }

    .div04 {
      height: 200px;
      width: 200px;
      background-color: rgb(171, 140, 140);
    }


  </style>
</head>
<body>
  <div class="div01"></div>
  <div class="div22">
    <div class="div02"></div>
  </div>

  <div class="div03"></div>
  <div class="div04"></div>
  <div class="div04"></div>
  <div class="div04"></div>
  <div class="div04"></div>
  <div class="div04"></div>
</body>
</html>
运行结果:
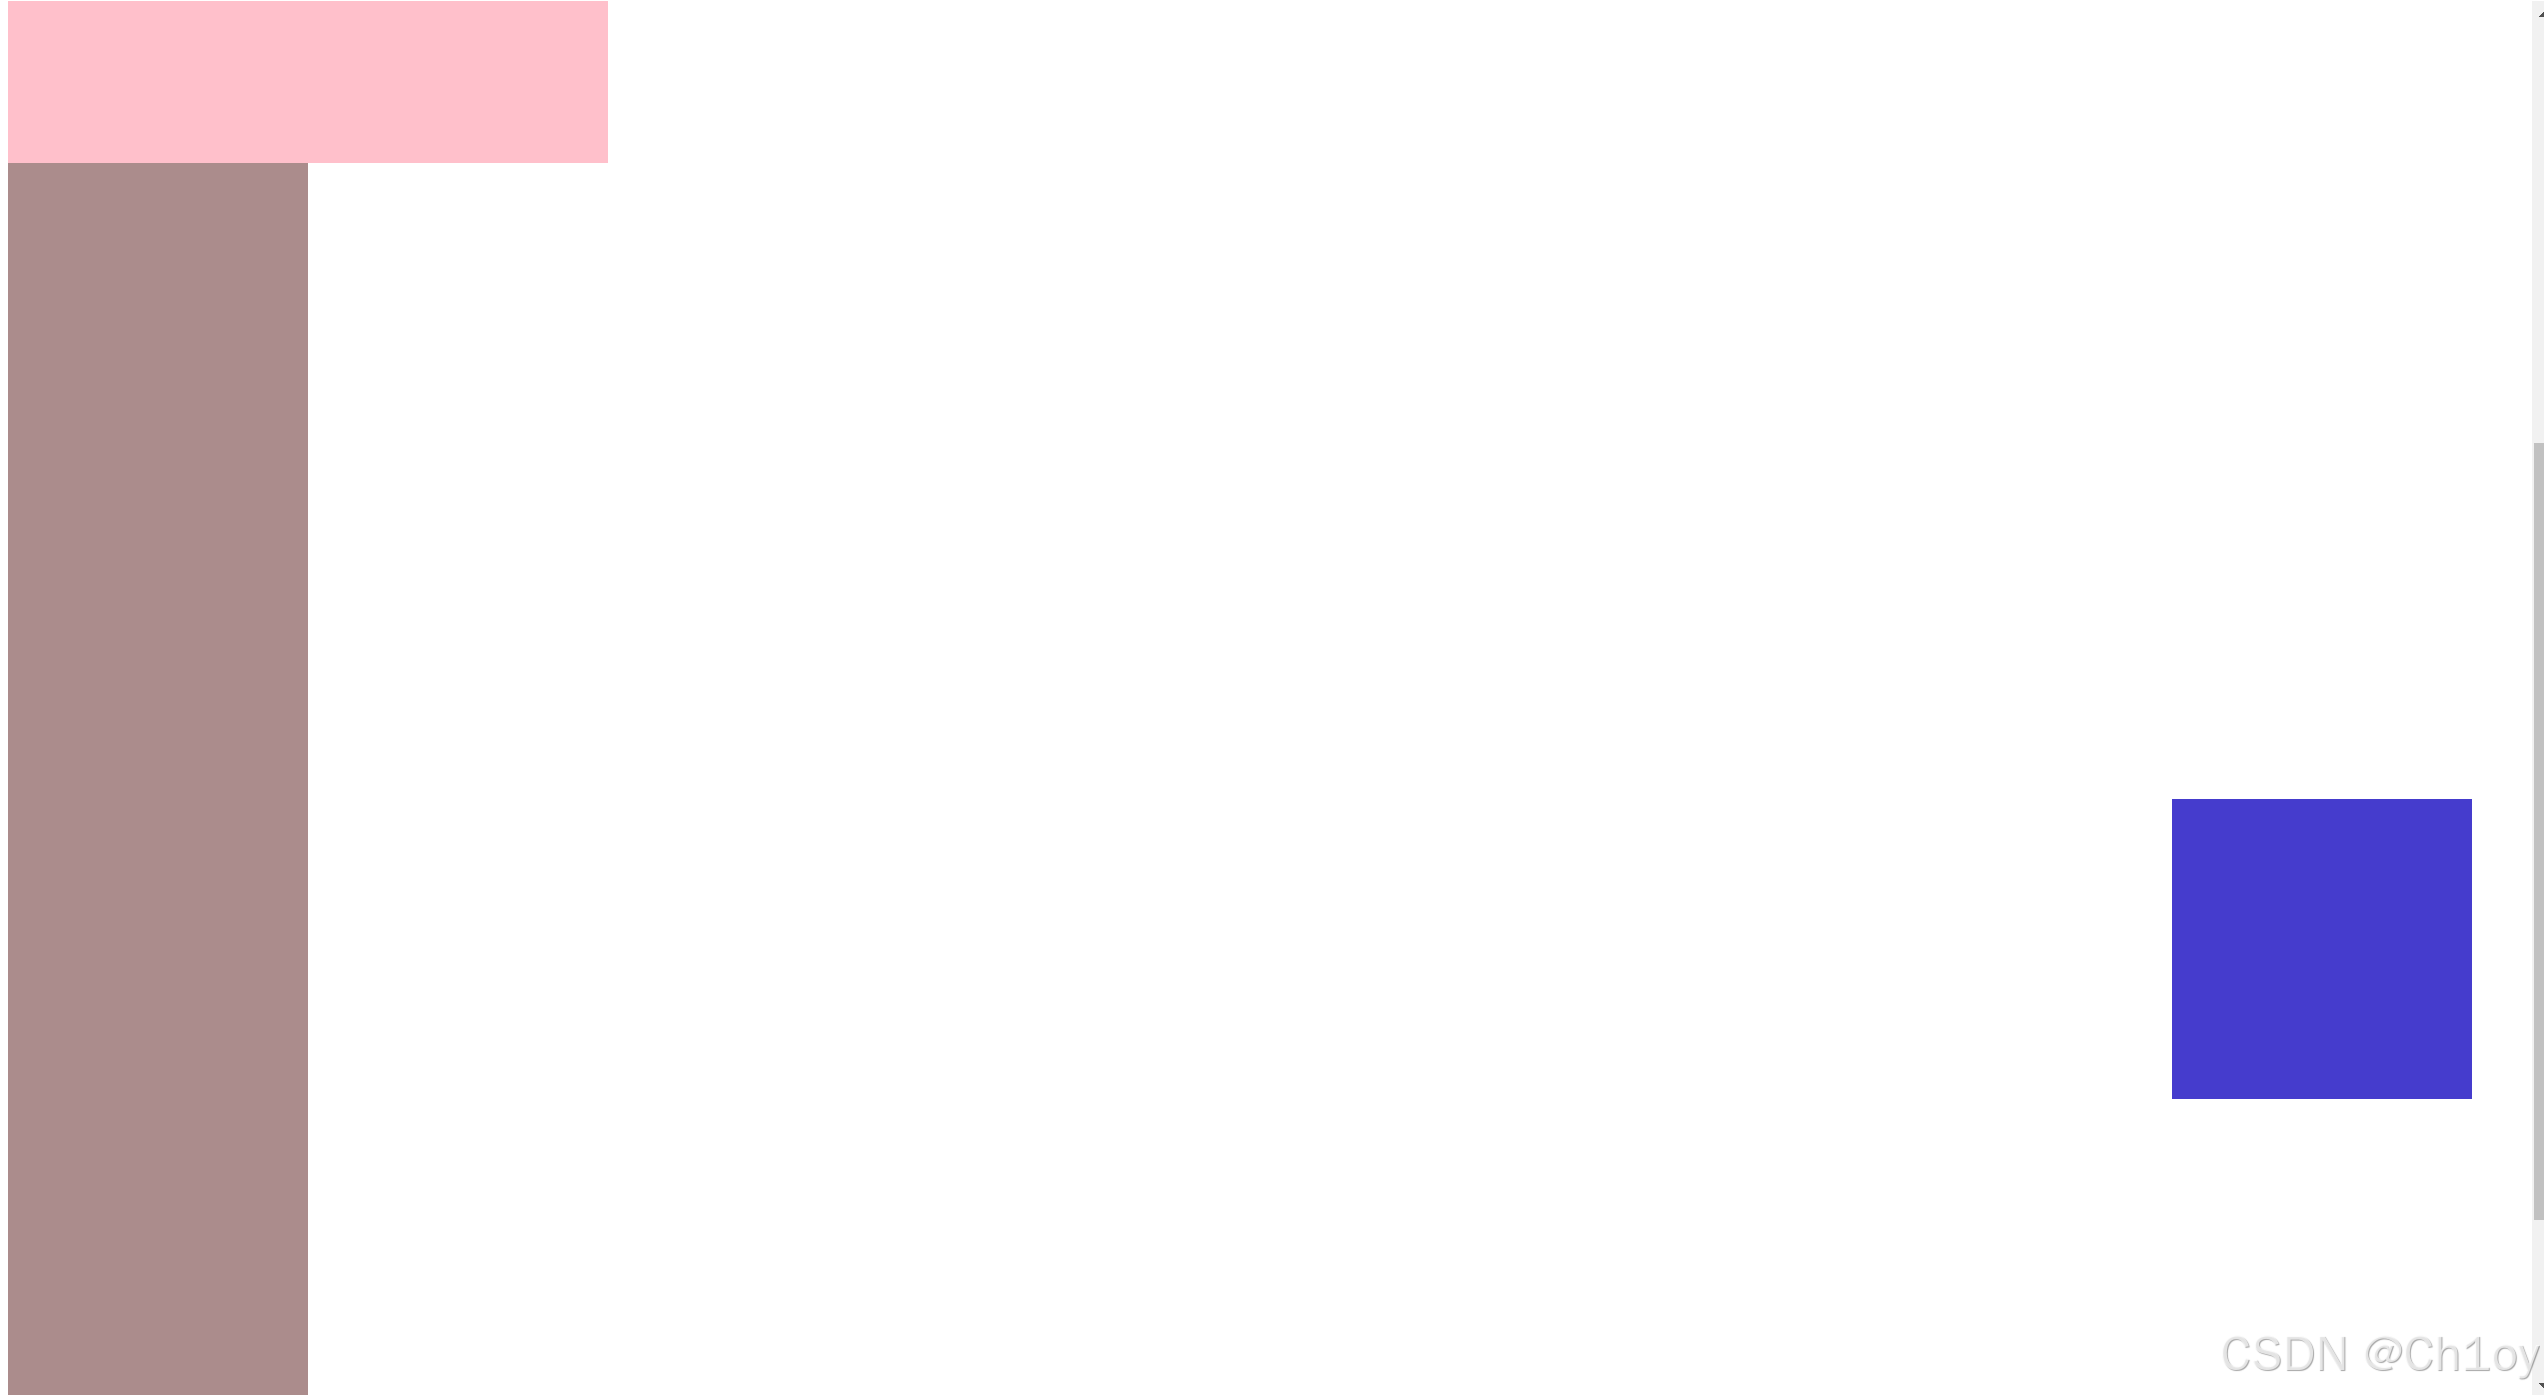
应用场景:
-
创建固定的导航栏、页脚等。
-
实现悬浮按钮、回到顶部按钮等。
总结
CSS定位是网页布局中不可或缺的工具,掌握position属性的各个取值及其应用场景,可以帮助你实现更加灵活和复杂的布局效果。在实际开发中,应根据具体需求选择合适的定位方式。
希望本文能帮助你更好地理解和应用CSS定位,提升你的网页布局能力。如果你有任何问题或建议,欢迎在评论区留言讨论!